With Docker image
We recommand to use Docker image for the pipeline depenancy management. Creating a Docker image for a Machine Learning (ML) project environment is a great way to ensure reproducibility, portability, and consistency across different development and production environments. Here's a step-by-step guide to help you create a Docker image for your ML project.
-
Install Docker
As IDOML do not provide an environment for build docker image neither the docker registry, you need to install Docker on your local machine. You can download Docker from the official Docker website. An account for public docker registry is also required to push the docker image. Here is some public docker registry you can use:
-
Create a requirements.txt File List all the Python dependencies your project needs in a requirements.txt file. Here’s an example requirements.txt file:
-
Create a Dockerfile
Create a Dockerfile in the root directory of your project. This file will contain the instructions to build your Docker image. Here’s an example Dockerfile:
# Use an official Python runtime as a parent image FROM python:3.8-slim # Install curl RUN apt-get update && apt-get install -y \ curl # install IDOML related packages RUN pip install s3fs boto3 lxml[html_clean] mlflow # Copy the requirements file into the container COPY requirements.txt . # Install any needed packages specified in requirements.txt RUN pip install --no-cache-dir -r requirements.txt -
Build the Docker Image
Open a terminal and navigate to the root directory of your project. Run the following command to build the Docker image:
-
Push the Docker Image to a Registry For IDOML pipeline to use the custom Docker image, you need to push the Docker image to a public registry such as Docker Hub or GitHub Registry. Here’s an example of how to push the Docker image to Docker Hub:
-
Configure the runtime image with elyra extension On the IDOML jupyterhub server, you can configure the runtime image with the elyra extension. Here is an example of how to configure the runtime image:
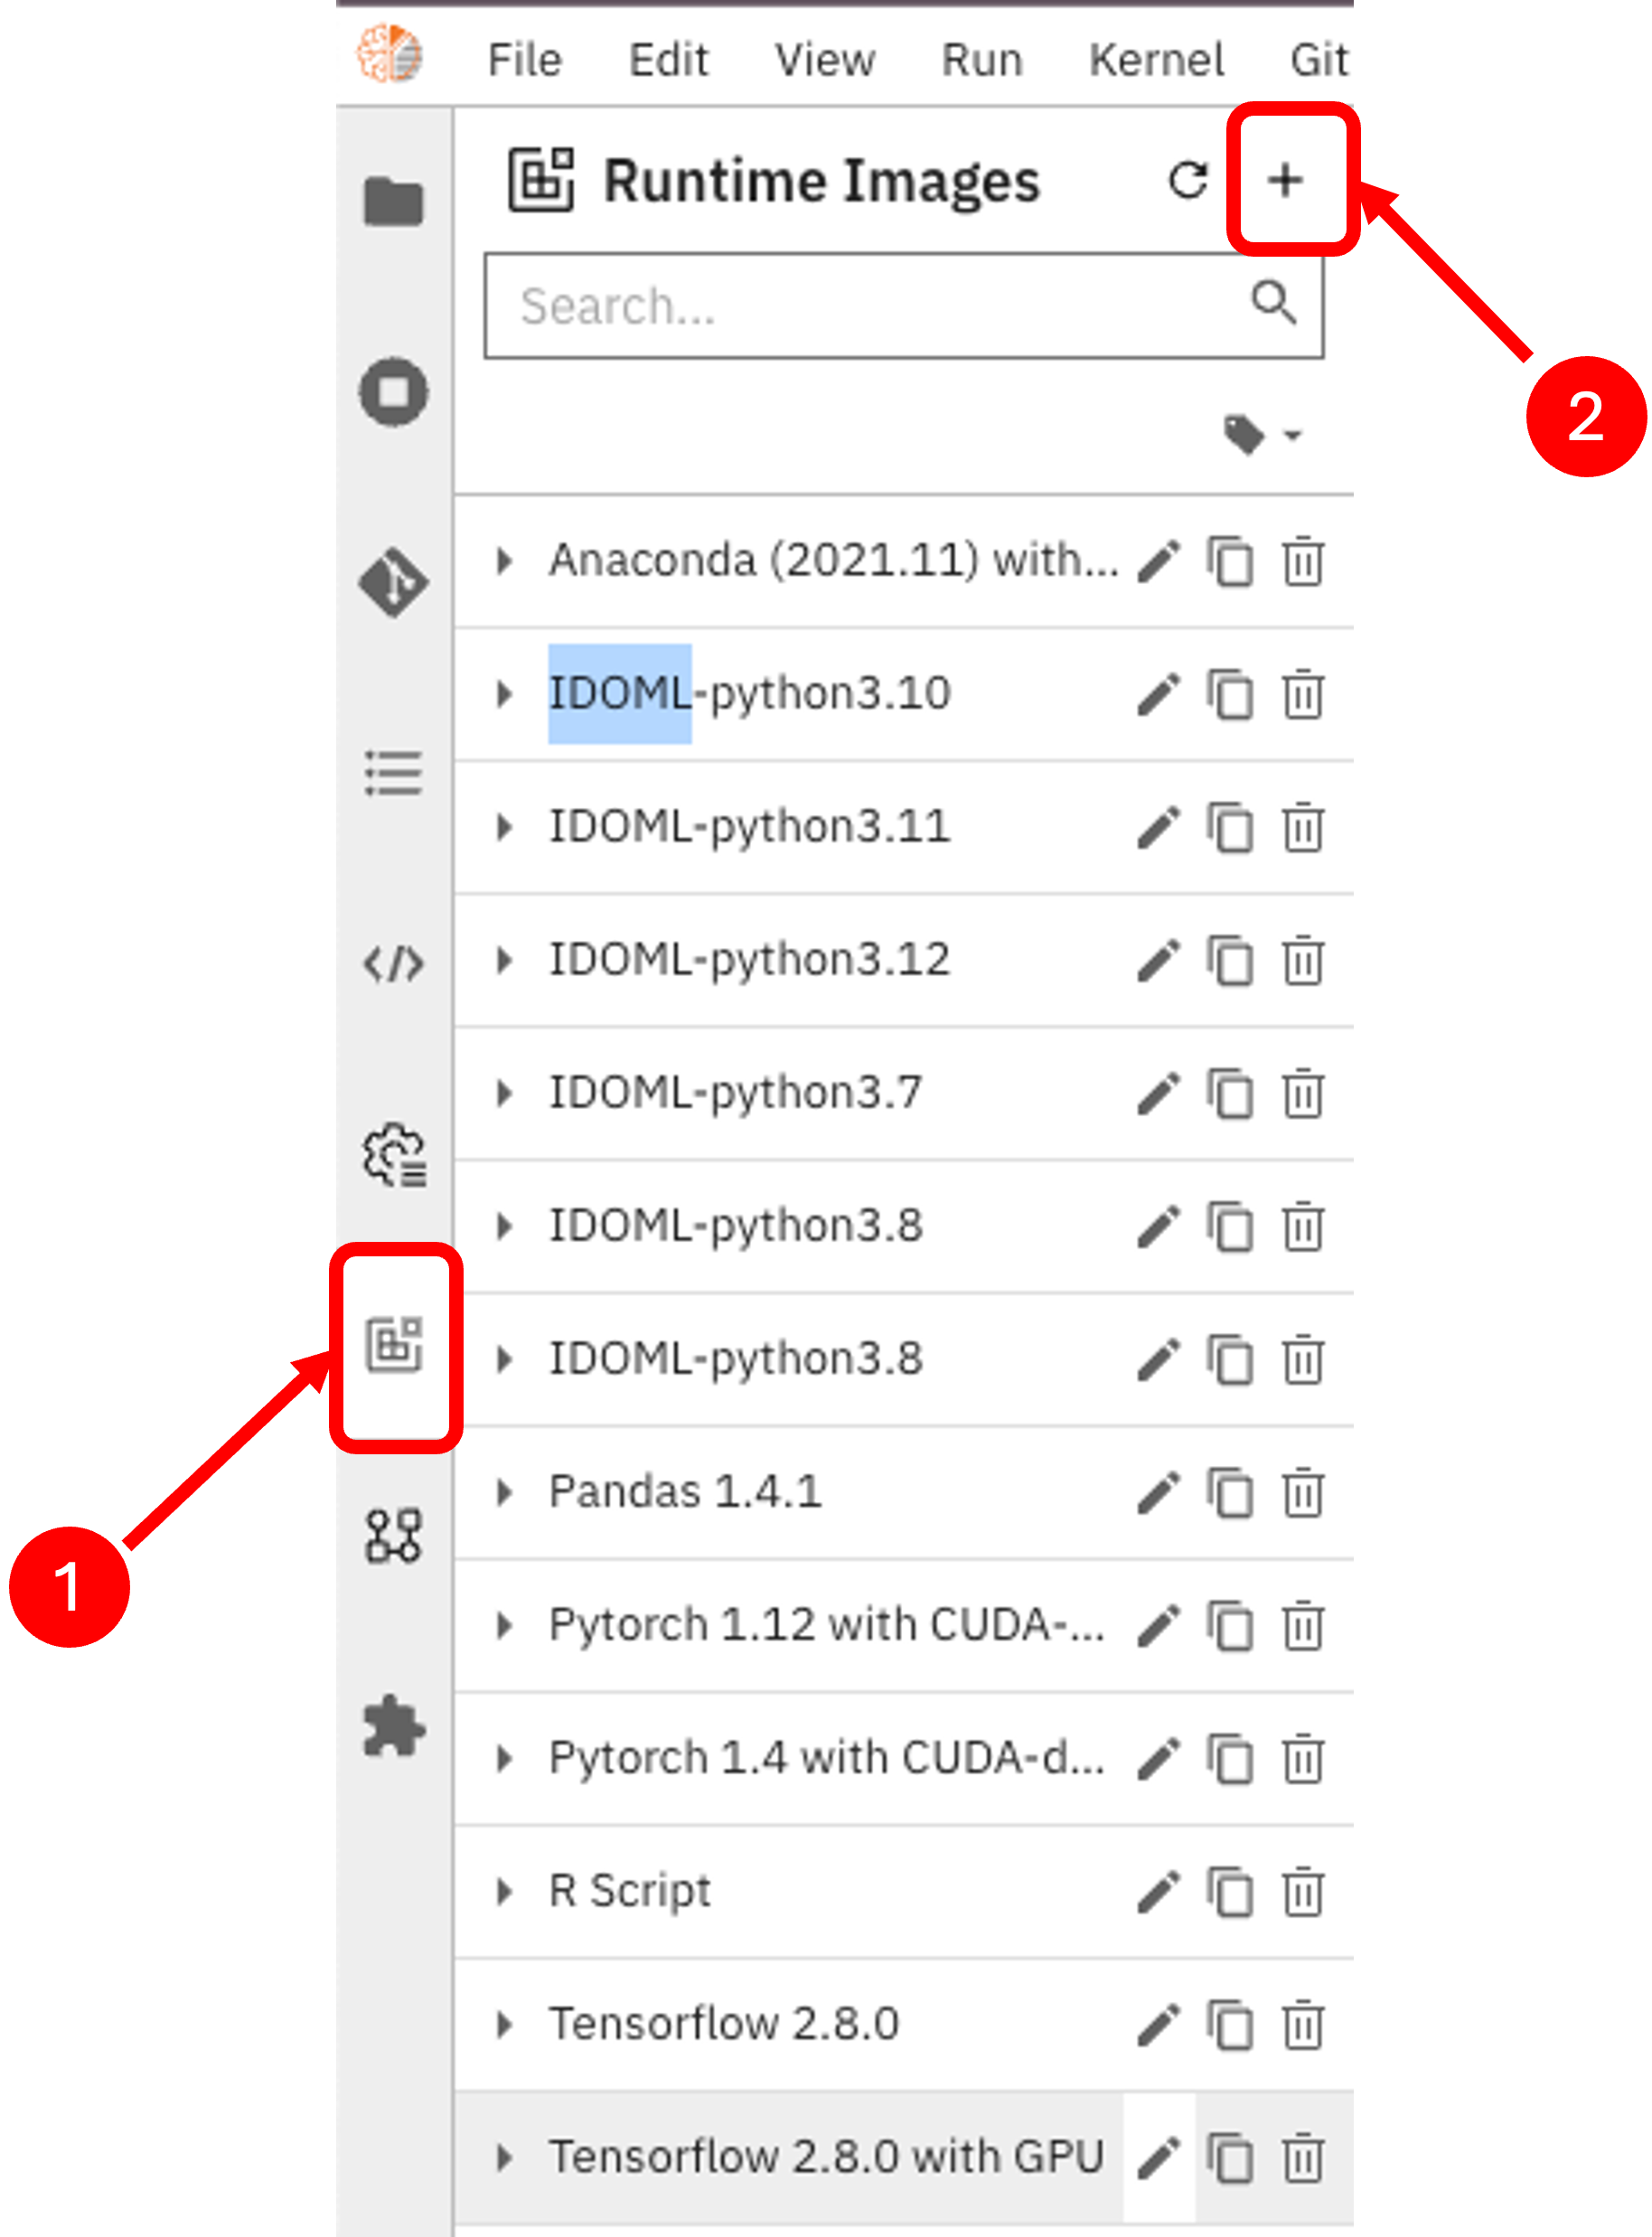
Click on the
Runtime Imagestab on the left side of the jupyterhub page, then click on the+button to add a new runtime image. Fill in the required fields and click on theSave & Closebutton to save the configuration. Make sure to specify the image you created in the previous step in theImage Namefield.